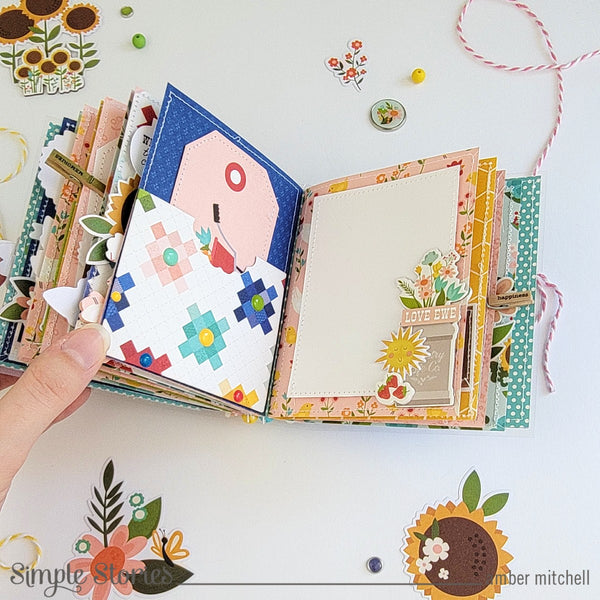
Hello crafty friends! Amber Mitchell here on the Simple Stories blog today to share with you this fun mini album I created using acetate and the Homegrown Collection.
I love the crossover of the end-of-summer, beginning-of-fall vibes that this collection brings. It's so vibrant and colorful and has me wanting to plan a few trips to my local farmer's market and pumpkin farm!


To create the outer base of this album, I used a piece of acetate that measured 5 by 10 inches. I scored this sheet on the 10-inch side at 4 and 6 inches. This gives the book a two-inch spine. If you do not have acetate, you could use another medium, such as vellum, to achieve the same look.


I matted both the inside and outside covers of my album, including the spine. To do this, I used the "Journal Elements" and the "Farm Life" patterned papers from the 12 x 12 Collection Kit.

To embellish the spine of my album, I added rolled flowers down each side of the spine. In between these rows, I strung a mixture beads and charms from my stash using elastic thread. I opted to use matching colors and symbols to those found in the Homegrown Collection. This small feature really ties the album together.

For the front cover of my album, I added a quilted heart that I created using scraps. As there are patchwork patterns scattered throughout this collection, this heart really drives home the “home sweet home” theme. To dress the cover up further, I added some stickers, bits and pieces, and a cute brad to create a fun cluster.


The pages of my book measure 4 ¾ by 7 ¾ inches. I scored on the 7 ¾ inch side at 3 ¾ and 4 inches. This creates a fold out page with a quarter inch gusset in the center. To adhere my six pages to the inside of my book, I used quarter inch double-sided tape. I added a strip to the back of each gusset and then carefully glued my pages down to the spine in the order I wanted the patterns to be in. For my pages, I used the following papers from the 12 x 12 Collection Kit: "Rise and Shine", "Love Grows Here", and "County Fair".


This book is designed to be more of a journal than an actual album, so I opted to just add one photo mat to every page layout. This leaves the album with 11 photo spots and 13 journaling/documenting spots. To some of these empty spots, I added pockets that journaling cards or even extra photos could be tucked into.

When it came to decorating this fun album, I used a mix of embellishments. These include the Foam Stickers, Cardstock Stickers, Chipboard Stickers, Puffy Stickers, Enamel Dots, Decorative Brads and the Bits and Pieces and Journal Bits packs from the collection. I layered these throughout the album in any empty spaces, on journaling cards, and even across photo mats for added decoration and interest.

I also created some handmade embellishments for this album using my Cricut and some punches from my stash. These embellishments, like the punched flowers and layered flowers add more texture and dimension throughout the album.

This album is ready for all sorts of fun, soon-to-be-fall memories! Thanks so much for stopping by my post today. I’ll see you next time with another fun project!


0 comments